Sunday, March 23, 2014

Hooray for Dirty Fingernails!

Don't worry, I didn't take any photos of my dirty fingernails.  But I was happy to have them!  We spent a few hours pruning the blueberry bushes and doing a spring groom of the hellebores.  It is still rather cold outside -- upper 30's today -- but it felt so good to get out and work in the garden. 
 
Four of our blueberry bushes are about seven years old.  We have never pruned them.  I now realize that we should have been shaping them from the very start. 
 
The goal of pruning is to create an open, vase shape to the plant.  An open, vase shape will allow good air-flow and make harvesting easier.  Damaged branches, crossed or rubbing branches, and any branches older than 5 - 7 years old should be removed.  As the canes on the blueberry bush age, fruit production will decline.  Pruning the bushes will encourage the production of new canes. 
 
Some of the worst looking branches (bent, crossed, rubbing) on our bushes were the oldest ones.  Because we have had so much fruit on the bushes the last several years, I was very anxious about pruning them.  I cut off viable branches today, so the plants may be less productive this year, but I know the bushes will be healthier and more productive in the long run.  
 
Unripe fruit in late June.
 
Ripe for the picking! Mid-July
  
Blueberries in various stages of ripening.  Mid-July
 
Blueberry bushes add fall color to the early November garden.
 
Hellebores are some of the first flowers to bloom in my garden.  They start putting up flower stalks as early as the beginning of January. 

Hellebore flower stalk - early January

During late winter, the leaves of the hellebores turn brown and ugly, and stray leaves from the deciduous trees collect around the crowns of the plants.  Our job today was to clear away the leaf litter from the fall and remove any messy Hellebore foliage.  Under all that mess, the flower stalks are already about 4 - 6 inches tall today, but the hellebores won't be in full flower until mid-April. 

An un-named white variety.
Having cleaned up some of the mess, we will now be better able to enjoy the upcoming show from the warmth of the indoors.  I can't wait!
 
An un-named mauve variety.  The nodding head of a more mature flower in the lower middle of the photo shows the developing seed pods.

Friday, March 21, 2014

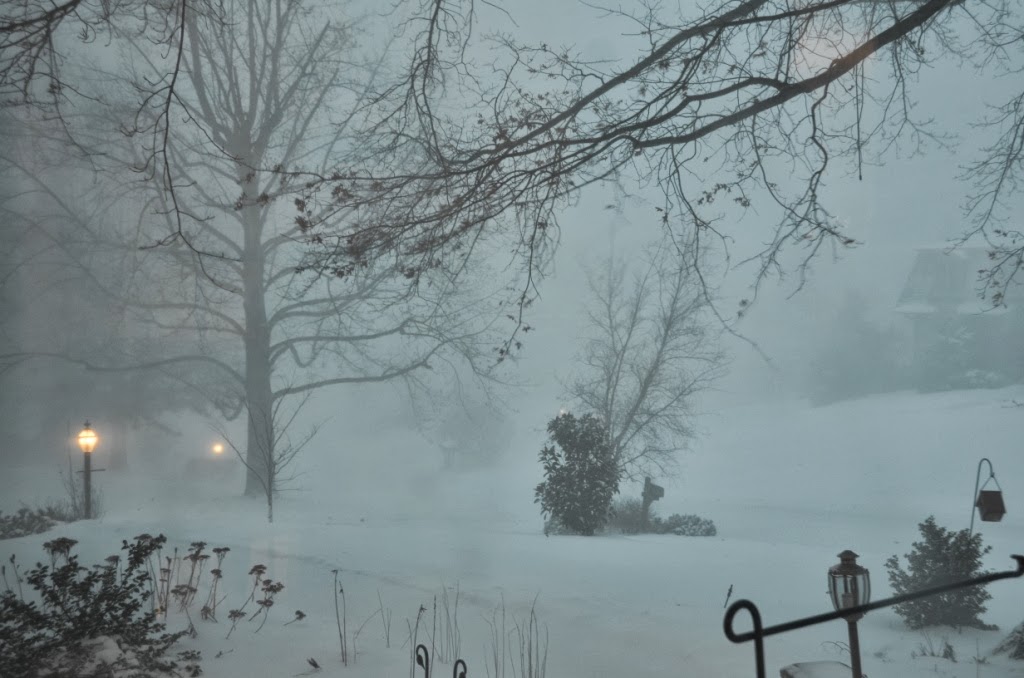
Happy First Day of Spring!

Outside my window right now...

Tuesday, March 18, 2014

Still Life

Still Life photography for my camera club's March homework...

Winter

Winter theme photograph for my camera club's February homework...

Holiday

Holiday theme photograph for my camera club's January homework...

Sunday, January 26, 2014

Blueberry Hand Pies and Blizzards

I have been dying to try making hand pies -- single-serving pies that can be eaten by hand.  Since it is just Eric and I at home, hand pies would give me the opportunity to make a tasty treat, without all the excess baggage that comes with a full-sized pie (several days worth of fat, calories and guilt; or throwing the extra servings away and suffering a different kind of guilt).  With hand pies, I could make a batch and freeze them in two-serving packets.  

Yesterday, I made these blueberry hand pies to take to a pot luck party.


Are they not the cutest?

Unfortunately, the party was canceled due to blizzard conditions. Now, instead of being stuck with an entire pie that we must eat or put to waste, I can easily freeze the extras.  I had one last night, Eric had one today, and the rest went into the freezer for later.  Yum. 

__________________________________

Blizzard photos from my front window...


And my back window...


___________________________

Wren Report - January Update

It has been months since we have seen the wrens.  While I was watching the snow from the latest Alberta Clipper fall outside my kitchen window this morning, guess who showed up under the gazebo.  Yep, our friend the wren.  He flew up into the rafters and hopped around for a while.  It looked as if he was searching for a cozy place to roost during the next storm.  He examined several roosting spots and even checked out the evergreen garland we have hanging in the front of the gazebo. But he didn't stick around for long.  I last saw him fly into the cozy looking arborvitae in the middle of our yard.

Origami Accordion Box

Don't worry, I'm not adding another craft to my list. 

I just happened across this video (http://www.youtube.com/watch?v=qzK47Ro3qhM) on YouTube while I was looking for something else related to a project I am working on.  The video shows how to make this paper box.


It is three accordion-folded paper cups (or boxes) that are nestled together to form a chain.  If you linked enough of the individual cups together, you could link the two ends together, forming an Origami water wheel. 

 
The opening of the middle cup faces down and is resting on the table in the pictures above.  In the picture below, you can see the opening of the middle cup. 

 
In her video tutorial, Leyla Torres uses two different Origami papers, with the middle cup being folded from a different paper than the outside cups.

My version is made of vellum paper, as I don't have any Origami paper.  Nor do I intend to start buying more expensive paper that I will never use.  I have more than enough scrapbooking paper that I will never use. 

(Wow. Did I just admit to having "more than enough" of anything?)